


What is terraform?
Terraform is an infrastructure as code (IaC) tool that allows you to build, change and version infrastructure safely and efficiently.
Terraform can manage both existing service providers and custom in-house solutions.
Terraform is developed by HashiCorp.
For writing code in terraform we use HCL(Hashicorp Configuration language).
What is Iac Tool?
Infrastructure as code (IaC) tool used create and manage your infrastructure through code.
The Benefits of Using Terraform
Consistency : With infrastructure being managed via code, it becomes very easy to version and track changes. Since cloud resource provision happens logically, we can rely on its consistency to create a scaled set of infrastructure.
Portability : You can use one tool and one language to describe the infrastructure for Google Cloud, AWS, OpenStack and any other cloud. The hassle of switching providers regularly is mitigated.
Ease of full-stack deployment : You can have Amazon instances running Kubernetes containers with your workloads and manage the whole system from one tool.
Easy collaboration : The Terraform registry (Terraform’s central registry version control) enables teams to collaborate on infrastructure.
Flexibility : Terraform not only handles IaaS (AWS, Azure, etc) but also PaaS (SQL, NodeJS). It can also store local variables such as cloud tokens and passwords in encrypted form on the terraform registry.
Automation : Terraform workflow manages the lifecycle of cloud resources – from their creation till they are destroyed or decommissioned. This provides an opportunity to enable end-to-end automation right from the infrastructure layer. Automation workflows also assist in strengthening deployment strategies. Read more about: Terraform automation.
Modular and DRY : Infrastructure can be developed in a modular way so that it can be reused across multiple projects. This approach also enables organizations to ingrain their security and governance practices around infrastructure resources, thus offsetting the initial efforts spent every time a new project kicks off.
Terraform Features
Declarative :** Terraform uses Hashicorp Configuration Langauge which provides a declarative syntax to develop infrastructure as code. The HCL configuration language helps declare the target state of cloud resources to be provisioned.
Cloud Agnostic : Terraform is a great tool to automate multi-cloud deployments. Its modular architecture enables working with multiple well-known cloud vendors simultaneously.
Ecosystem : The provider and module ecosystem of Terraform is well established. Certified modules and providers are available on Terraform Registry to be readily used. Customers can create and publish their own modules both publicly and privately.
Extendible : Terraform can be extended to support lesser-known or private data centers.
Agentless : Terraform works with the programmatic access provided by cloud provider APIs. Thus there is no need to install agents.
Prerequisites
Terraform Installation
Git Bash
An Editor, preferably VS Code
Install AWS CLI
Basic Cloud knowledge
AWS Account
Installation of Terraform(Windows Version)
Open the terraform official website (terraform.io)
Click on Download.
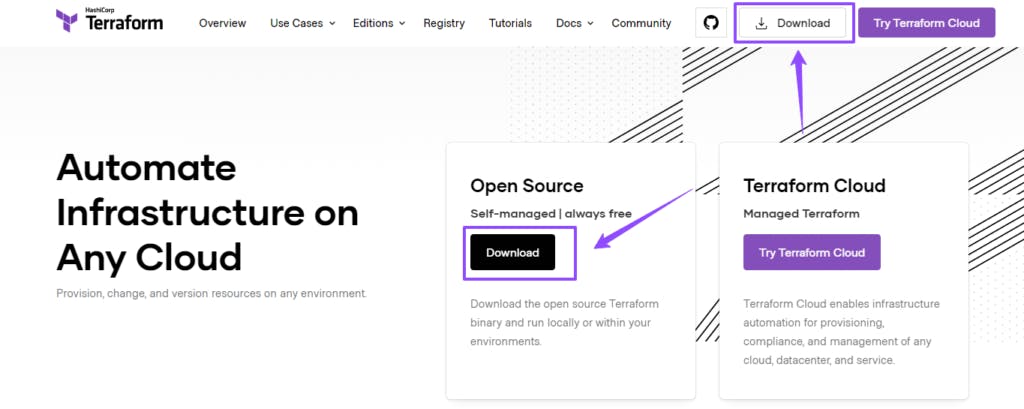
Appear the below screen shot.
Select the Operating system Windows
download the respective version. I download the 64-bit binary.
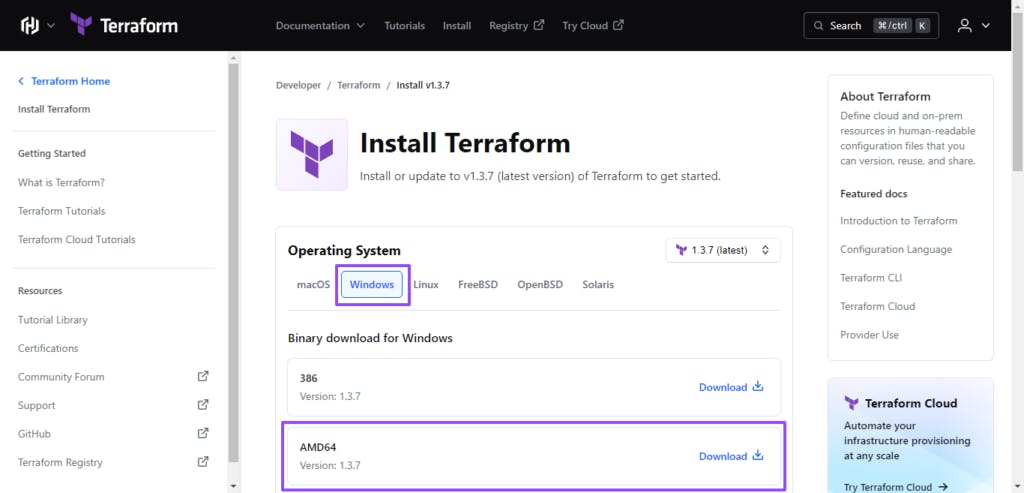
It will download a zip file. Create a folder on the C drive as C:/terraform. Download the zip file in this folder. Unzip the file to extract the .exe file.**
Select the Operating system Windows
download the respective version. I download the 64-bit binary.
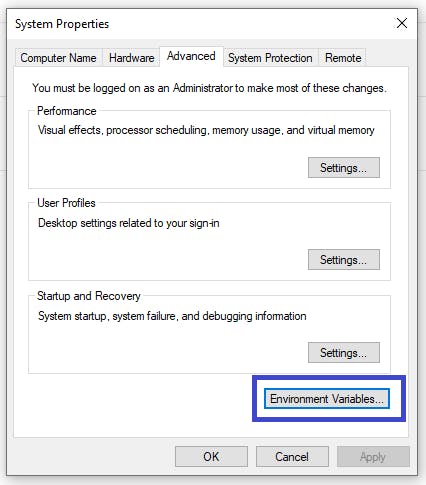
Update Path Environment Variable
- Next open the Start menu and search for Environment variables. Open the Environment variables settings page.
On the Environment variables edit page, open the Path variable as shown below:
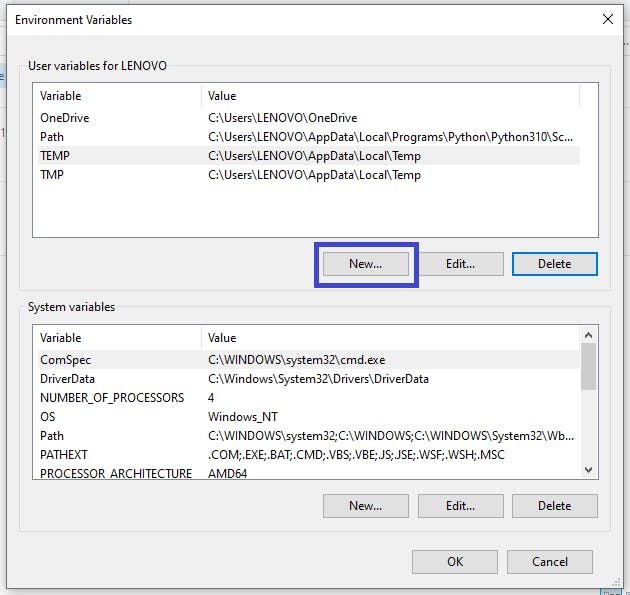
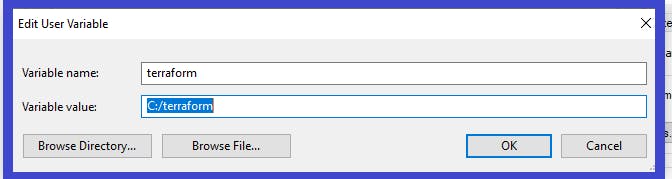
On the opened Path pop up, click New and add the Terraform path
Click OK on the above window to save the Path variable addition.
Installation of Git Bash
Download the Git Bash setup from the official website (git-scm.com)
Click the Download for windows.
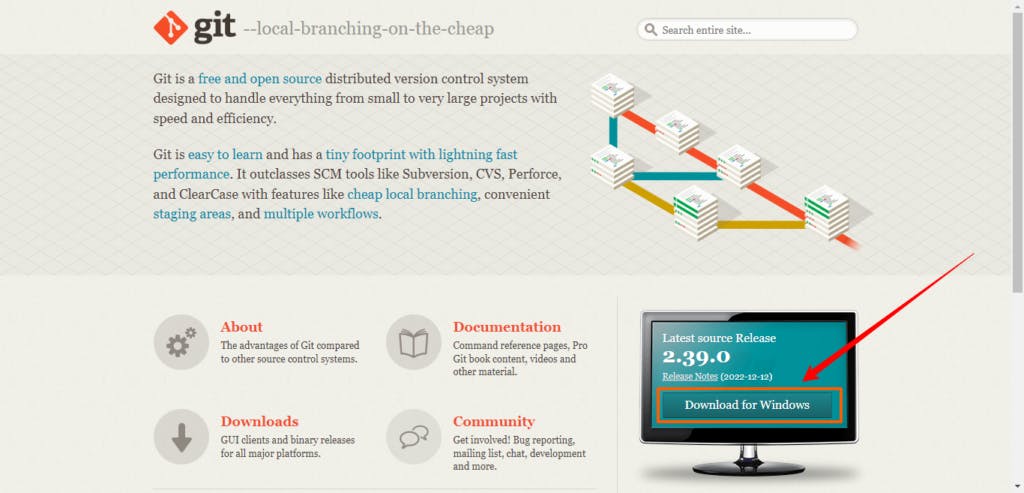
It will appear the below screenshot.**
- Select the respective version.

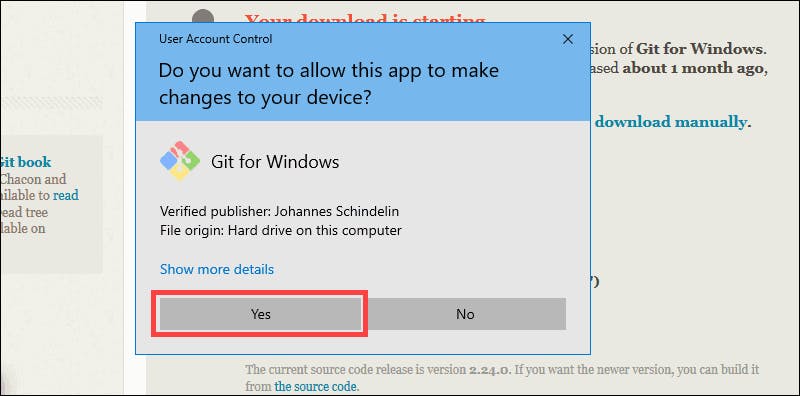
Browse to the download location (or use the download shortcut in your browser). Double-click the file to extract and launch the installer.

Allow the app to make changes to your device by clicking Yes on the User Account Control dialog that opens.
Review the GNU General Public License, and when you’re ready to install, click Next.

The installer will ask you for an installation location. Leave the default, unless you have reason to change it, and click Next.

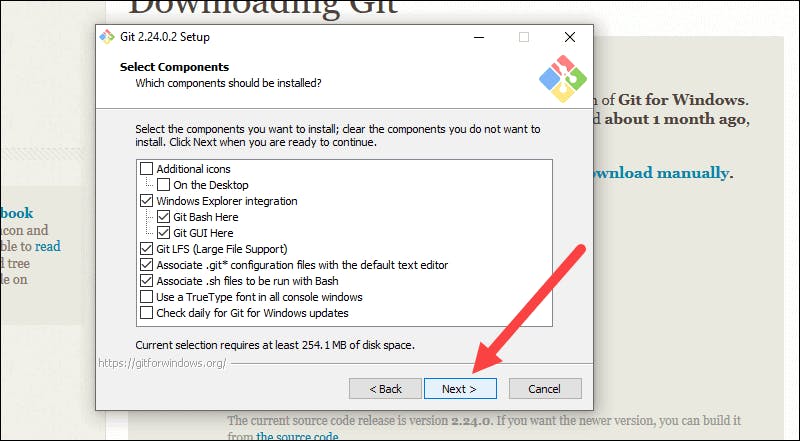
A component selection screen will appear. Leave the defaults unless you have a specific need to change them and click Next.
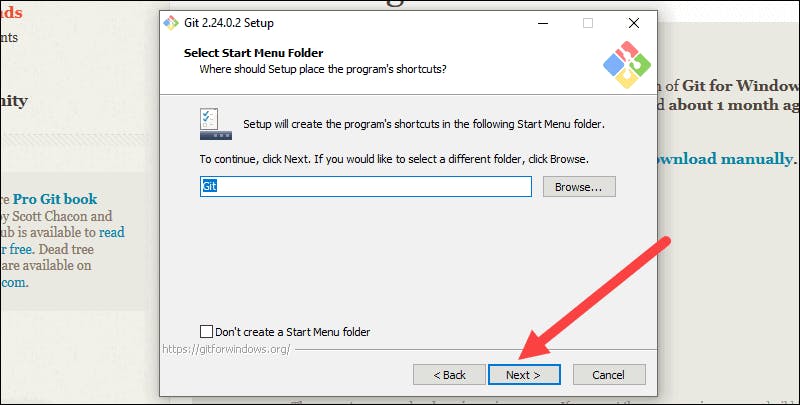
The installer will offer to create a start menu folder. Simply click Next.
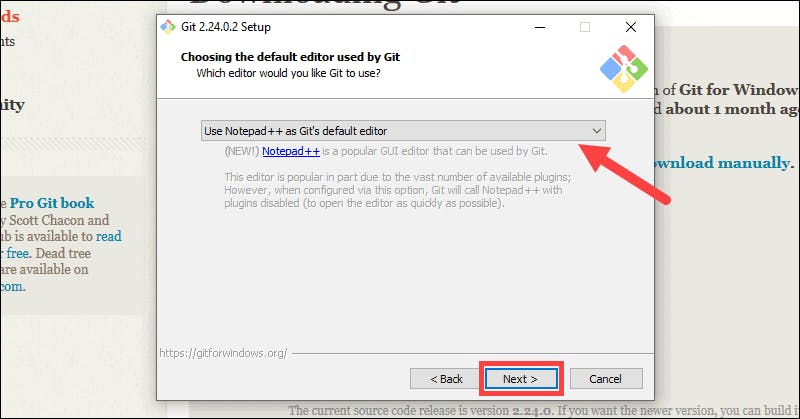
Select a text editor you’d like to use with Git. Use the drop-down menu to select Notepad++ (or whichever text editor you prefer) and click Next.
The next step allows you to choose a different name for your initial branch. The default is 'master.' Unless you're working in a team that requires a different name, leave the default option and click Next.

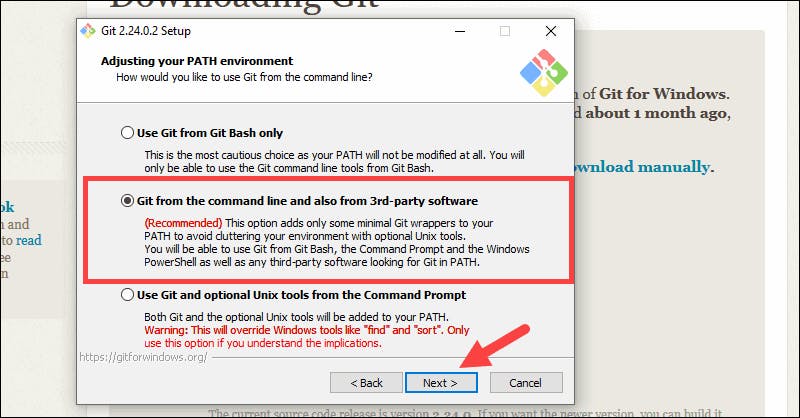
This installation step allows you to change the PATH environment. The PATH is the default set of directories included when you run a command from the command line. Leave this on the middle (recommended) selection and click Next.
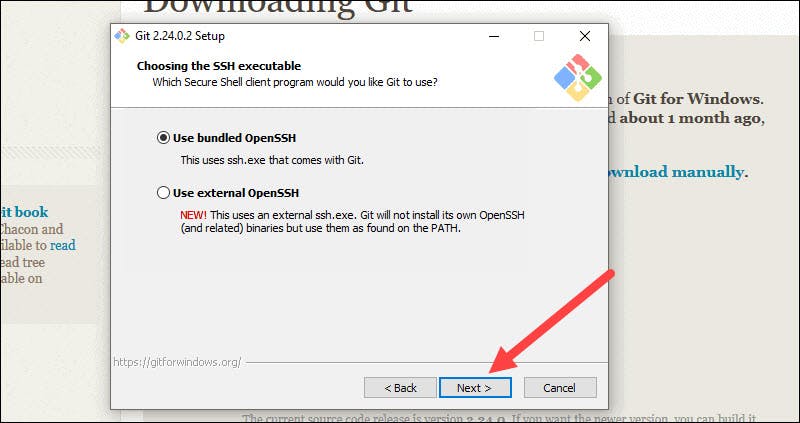
The installer now asks which SSH client you want Git to use. Git already comes with its own SSH client, so if you don't need a specific one, leave the default option and click Next.
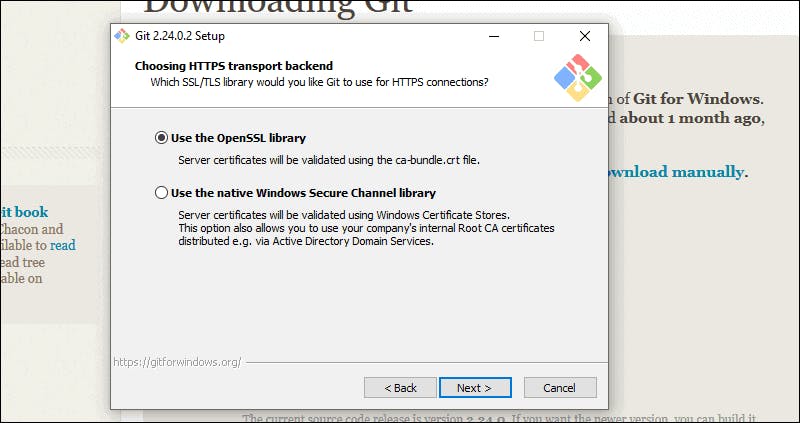
The next option relates to server certificates. Most users should use the default. If you’re working in an Active Directory environment, you may need to switch to Windows Store certificates. Click Next.
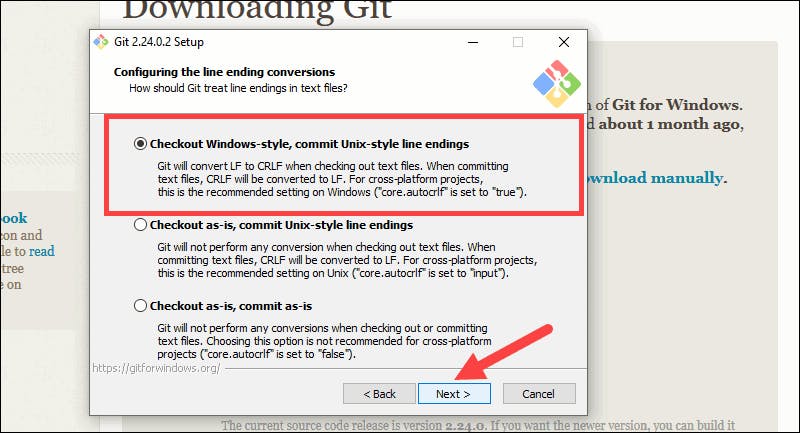
The next selection converts line endings. It is recommended that you leave the default selection. This relates to the way data is formatted and changing this option may cause problems. Click Next.
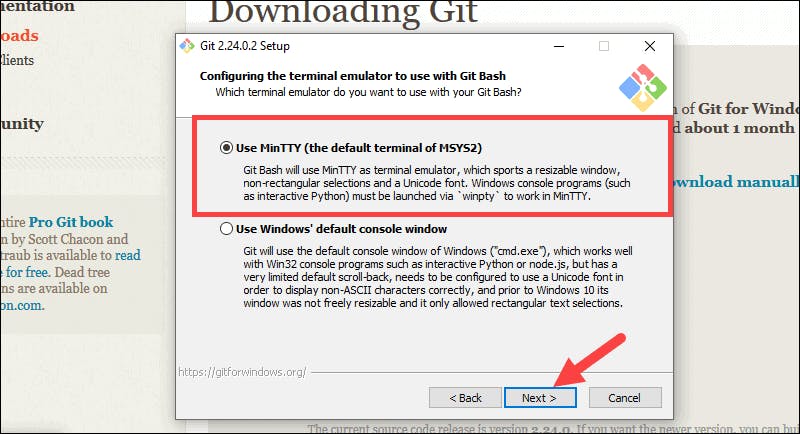
Choose the terminal emulator you want to use. The default MinTTY is recommended, for its features. Click Next.
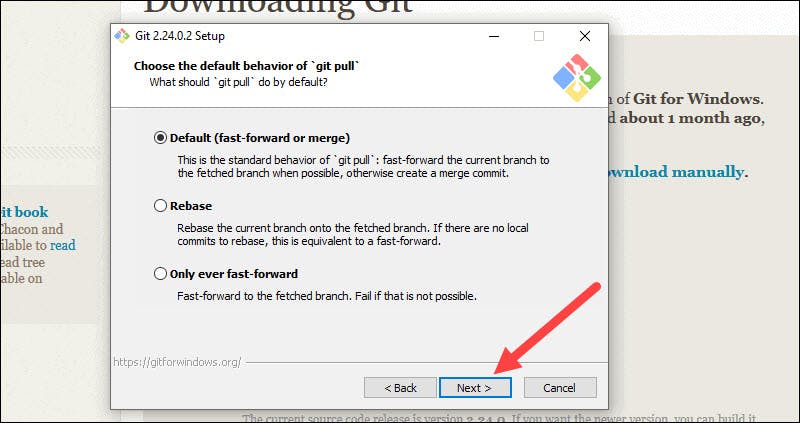
The installer now asks what the git pull command should do. The default option is recommended unless you specifically need to change its behavior. Click Next to continue with the installation.
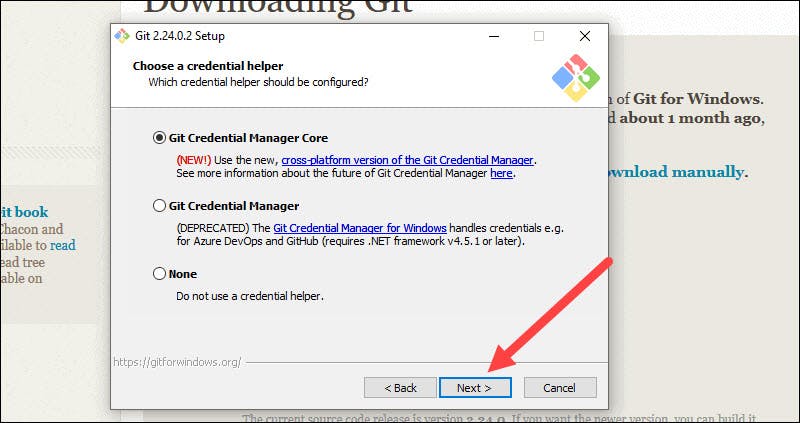
Next you should choose which credential helper to use. Git uses credential helpers to fetch or save credentials. Leave the default option as it is the most stable one, and click Next.
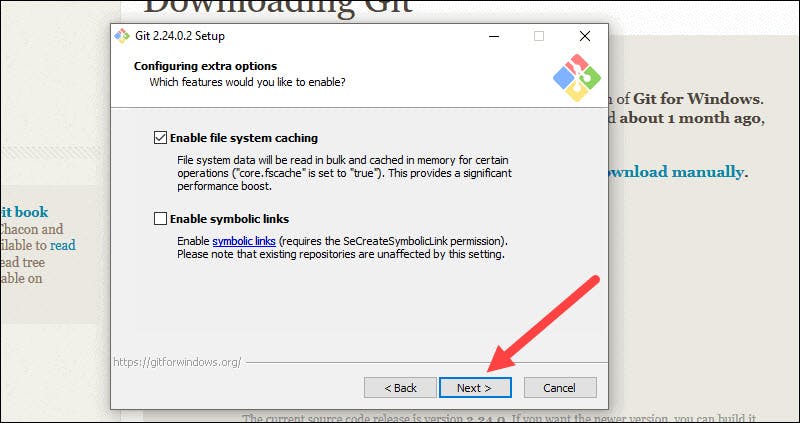
The default options are recommended, however this step allows you to decide which extra option you would like to enable. If you use symbolic links, which are like shortcuts for the command line, tick the box. Click Next.
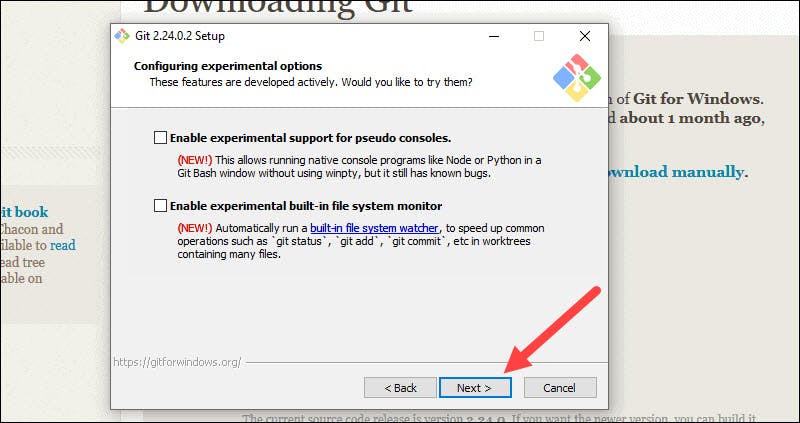
- Depending on the version of Git you’re installing, it may offer to install experimental features. At the time this article was written, the options to include support for pseudo controls and a built-in file system monitor were offered. Unless you are feeling adventurous, leave them unchecked and click Install.
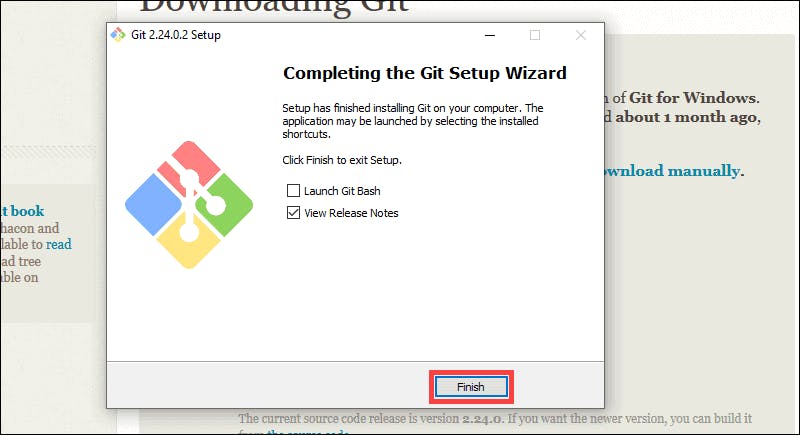
Once the installation is complete, tick the boxes to view the Release Notes or Launch Git Bash, then click Finish.
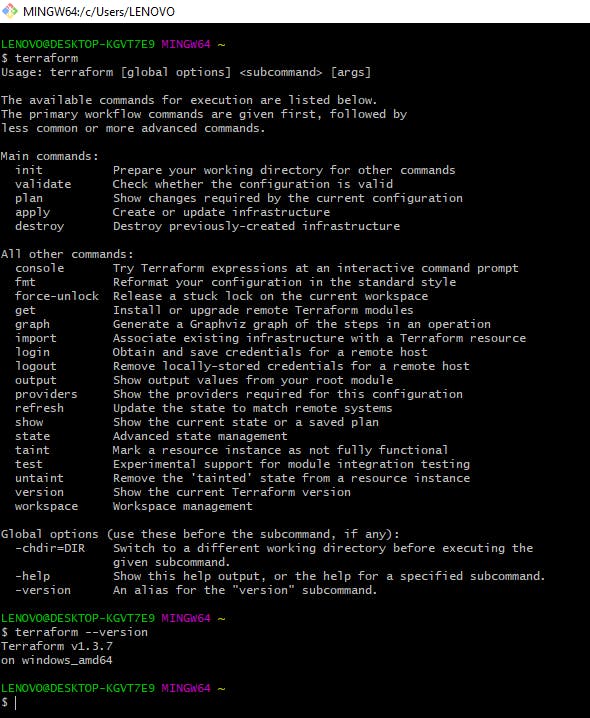
Open Git Bash and run this command to verify Terraform is installed successfully:
Installation Of Visual Studio Code :
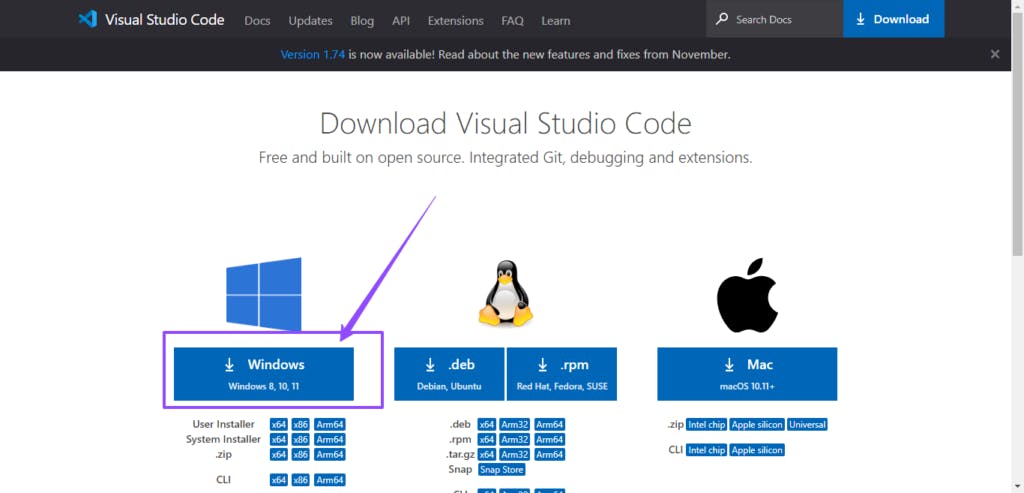
Open the visual studio code official website (code.visualstudio.com/download)
Click on Windows Download icon.
It will download a zip file. and extract the file.
Click on the installer icon to start the installation process of the Visual Studio Code.
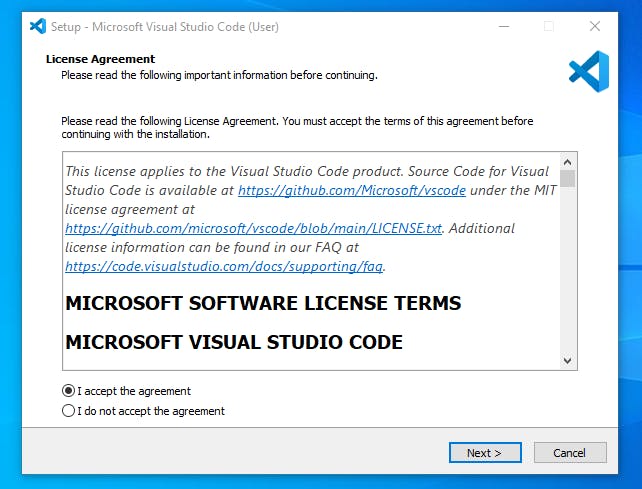
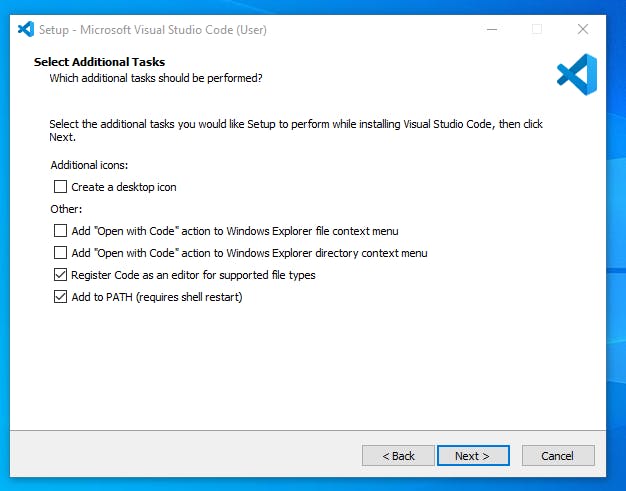
After the Installer opens, it will ask you for accepting the terms and conditions of the Visual Studio Code. Click on I accept the agreement and then click the Next button.
Choose the location data for running the Visual Studio Code. It will then ask you for browsing the location. Then click on Next button.
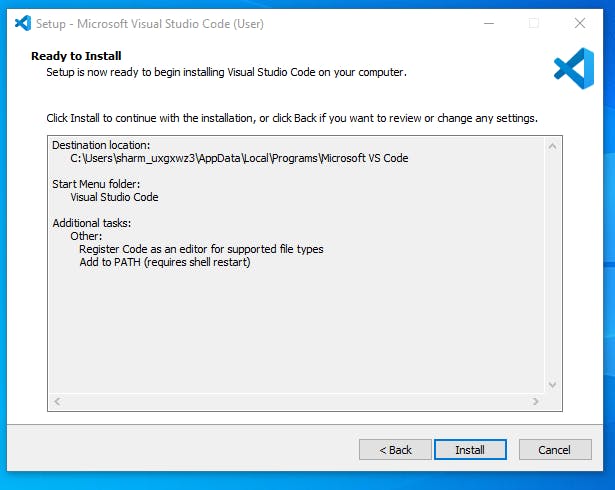
Then it will ask for beginning the installing setup. Click on the Install button.
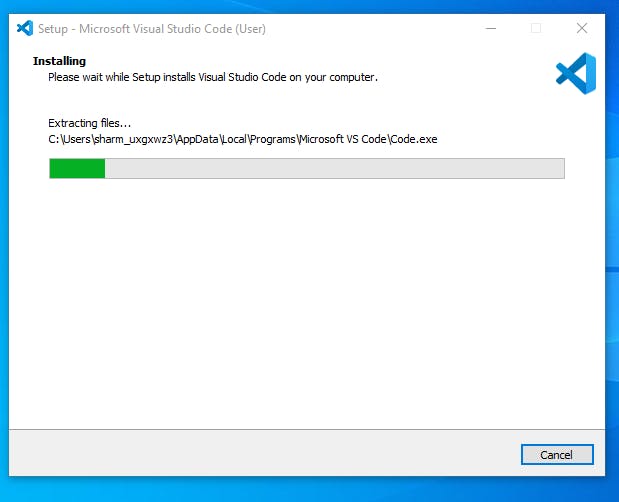
After clicking on Install, it will take about 1 minute to install the Visual Studio Code on your device.
After the Installation setup for Visual Studio Code is finished, it will show a window like this below. Tick the “Launch Visual Studio Code” checkbox and then click Next.

- After the previous step, the Visual Studio Code window opens successfully. Now you can create a new file in the Visual Studio Code window and choose a language of yours to begin your programming journey!
Installation of AWS CLI (Windows Version)
Click this URL automatically download the AWS CLI (awscli.amazonaws.com/AWSCLIV2.msi)
Below file was downloaded. then click on that.

Click on the installer icon to start the installation process of the AWS CLI.
Click on next.

After clicking the Next it will appear below screenshot.
After the Installer opens, it will ask you for accepting the terms and conditions of the AWS CLI.
Click on Next

After clicking the Next it will appear below screenshot.
Choose the location data for running the AWS CLI. It will then ask you for browsing the location. Then click on Next button.
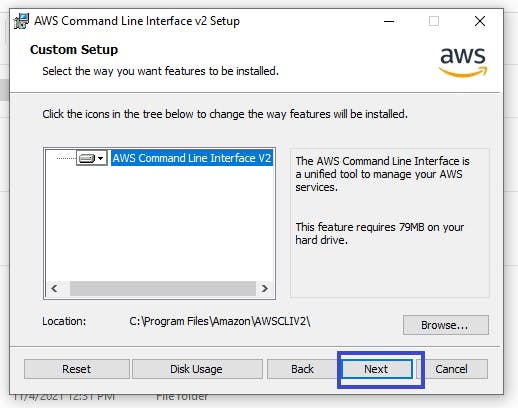
After clicking the Next it will appear below screenshot.
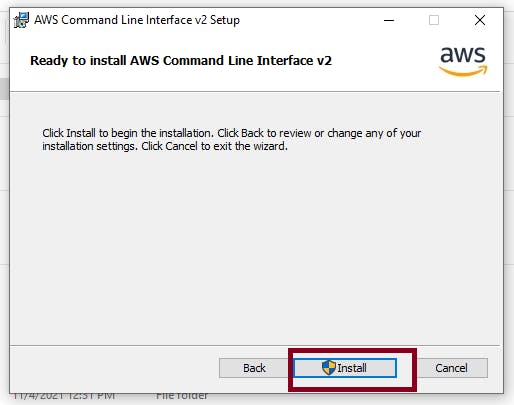
Then it will ask for beginning the installing setup. Click on the Install button.
After clicking the Next it will appear below screenshot.
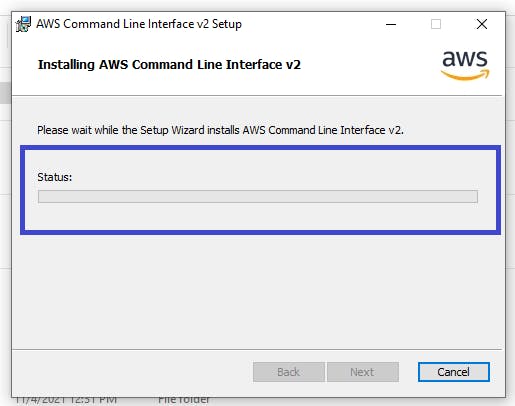
After clicking on Install, it will take about 1 minute to install the AWS CLI on your device.
Then click on Next.
After clicking the Next it will appear below screenshot.
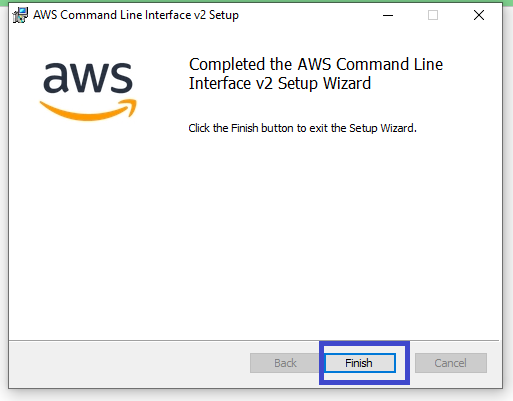
After the Installation setup for Visual Studio Code is finished, it will show a window like this below.
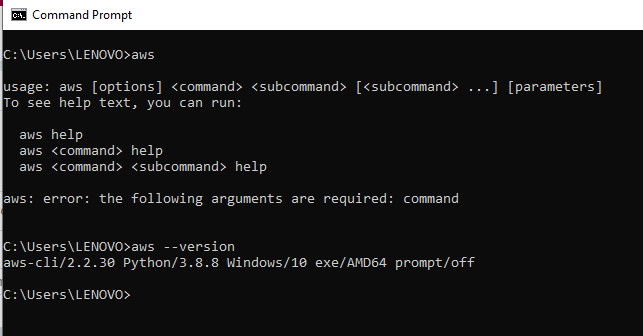
Open the Command prompt & Run the aws commands.
Conclusion:
You will learn about What is Terraform , Benifits of Terraform , Features of Terraform . how to install terraform , How to install Git bash, How to install VS code & How to install AWS CLI in this Blog.